

We bought a tiny rumored haunted house (We would later find out) in a small harbour town in our home province of Newfoundland and Labrador, Canada. And we moved home for almost a year recently to rejuvenate the property to a vintage country, downhome style saltbox home.
Built in the late 1800’s, our humble, two floor home reaches only 15 feet in height. Each floor only 7 feet high. The definition of cosy.
This place was small in space but HUGE in potential!
Over last year, we absolutely loved exploring the property for old pieces, hunting down historical records and photos, and meeting so many wonderful people in the town to hear their stories of growing up there and to help fill in more missing pieces of the house’s long history.
But for now, back to renovating. Giving this house a facelift.
With only $8,000 in funds and just our spare time and the help of our friends and family, we had our work cut out for us.
First there was the curb appeal that we had to fix.
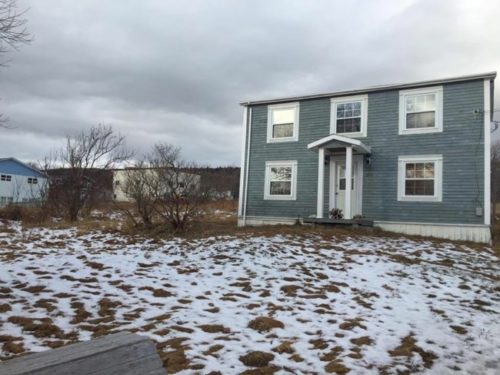
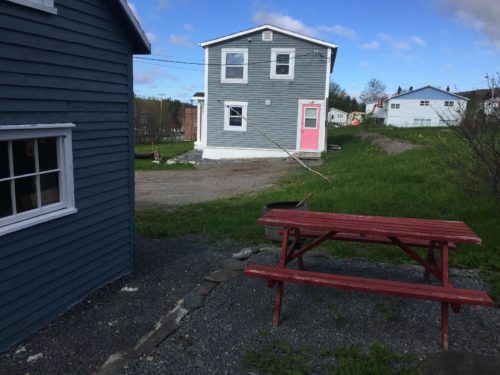
The Yard Was an Absolute Mess…
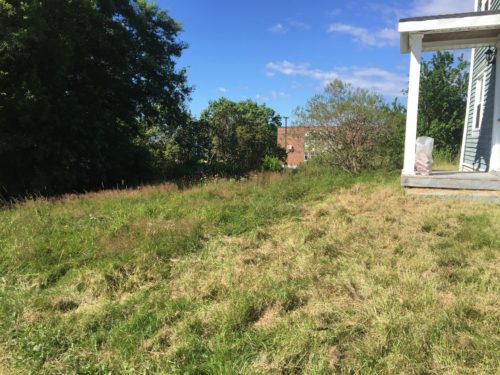
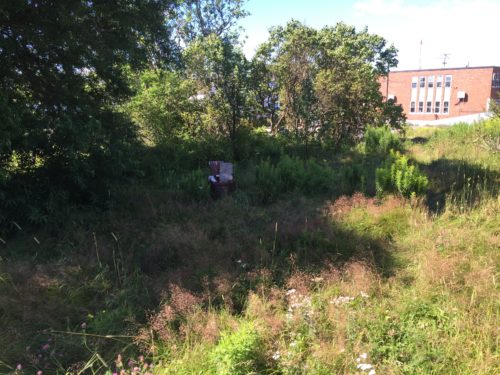
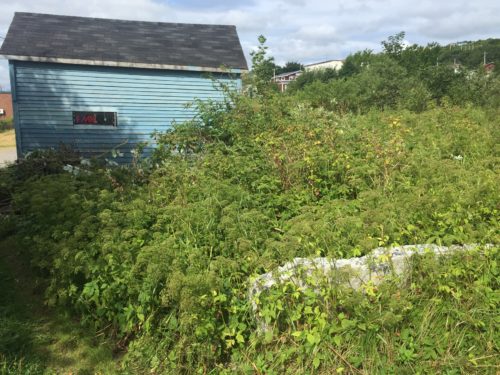
The lawn hadn’t been mowed in most likely years. There was weeds and thorny raspberry bushes everywhere. Mounds of concrete in the ground, dead trees, burnt and dead grass, a dilapidated fence, a massively overgrown tree, rusted burn barrels, piles of concrete, the whole works.
Then when we cleaned all that up we found the buried root cellar (we thought it was a grave for moment) and all the fun discoveries that went along with that which you may have read about. And if you haven’t go do it!
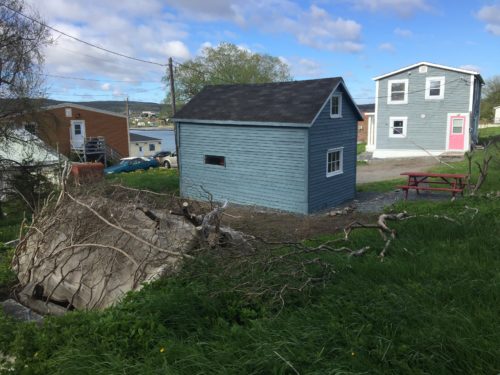
Gravel walkways needed to be installed around the house and shed.
The two-floor shed was full to the ceiling with 30 years of old couches, TVs, scratch and win tickets, mouldy Christmas ornaments and a whole lot more too long damaged to be taken anywhere but the dump, except for the WORKING VCR with one of our favourites “Contact” still inside which was an absolute GEM!
We built up a spot for a fire pit (made of bricks from my Grandfather Frank’s garage) and chairs in the main yard, and a second firepit outside dining area behind the shed for when the wind picks up on the front.
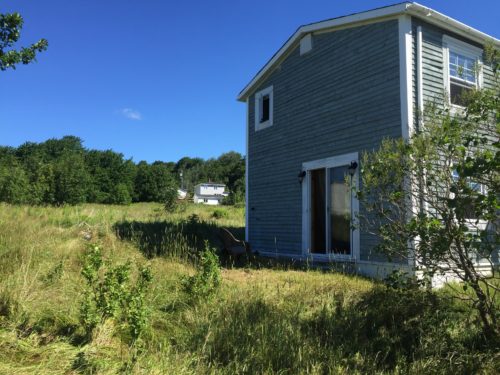
The House Exterior Was a Bit Worse for Wear…
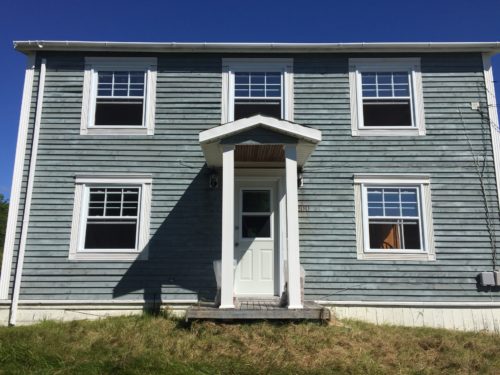
The whole exterior of the house needed to be screwed in before the wood peeled away. Fix the shingles over the porch eave, replace the windows in the shed, fix rotting wooden panelling, replace the eaves trough, replace the wooden bases of three sides of the house. And reinstalled door knobs and locks on the house and shed.
We had to dig down 3 feet all around the house (this was the most work) to install weeping tile and fill with gravel and build a two foot hill dam around the back of the house to finally deter any more flooding from melting snow from the field in the backyard.
We built planters out of old propane tanks and pallets and planted new trees, roses, sunflowers and wild flowers around the house which we hope to see more of over the coming years 😊.
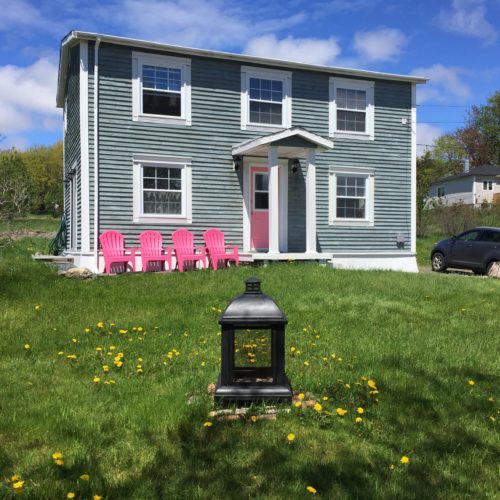
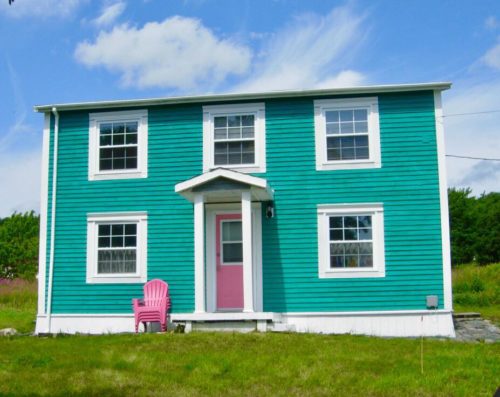
So for those of you not from Newfoundland, you haven’t heard of our colourful competition, Jelly Bean Row houses.

With houses painted every colour of the rainbow all around Newfoundland for nothing but the sheer joy of adding colour to the world, it makes it really hard to stand out. So you’ve gotta go big or go home!.
We chose to re-stain the house aqua, repainted all the trims and lights white, and painted the doors pink. Giving a close nod to the green, white and pink colours of the Newfoundland Republic flag.

Alright that’s it for now! But we’ve got two more parts ready to go.
Next blog we’ll give an update on the kitchen and living room. And then the bedrooms and bathroom.
But until then don’t forget to follow us:
YouTube – Subscribe Here
Instagram – @GaysAroundTheBay
Email – Submit your email in the subscription box
Thanks guys!
Chris and Larry


Had the absolute pleasure of reading this blog last night, which of course led me to the link about the buried root cellar (you thought was a grave)
Having peeked my interest/morbid mentality, I immediately followed the link before reading on.
I just had to get the “dirt” on what was actually hiding beneath the surface!!
Now, having satisfied my curiosity, I came back and finished reading and lost myself completely in your before n after storytelling.
So very well done!!!
What an adventure, I simply love that you are restoring the charm of this beauty, this also makes me homesick , I can’t wait to travel to NL this summer! All that yummy salt air, sigh!
I LOVE IT- SO CUTE!
I’m also super curious about these ghost stories but kinda creeped out too. haha
Looks wonderful, you two! Congratulations! When do we get to see pictures of the inside? 🙂
Comments are closed.